

How To Get To The Face Shrine
Getting the Boomerang

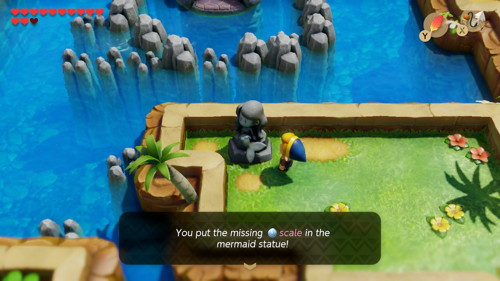
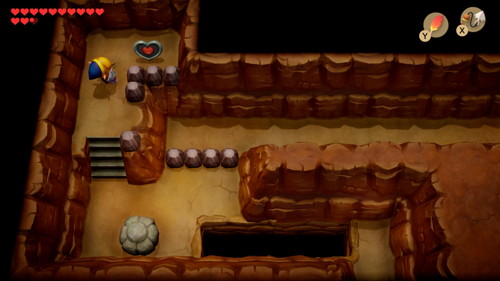
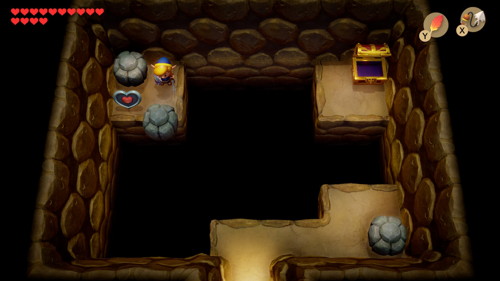
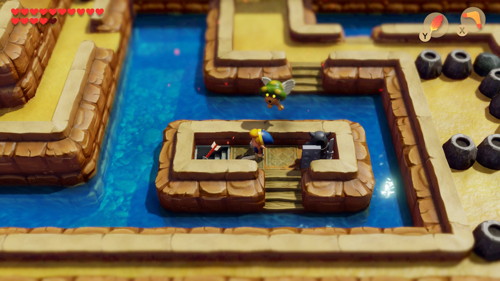
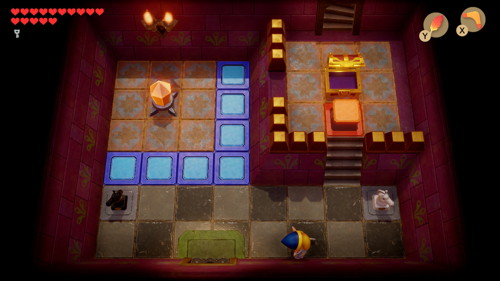
Exit this enclosed area in forepart of Catfish's Maw past diving downwards into the bubbling and making your way through the underwater department. Exit the bay onto land to the eastward. Become around the trees and and then head all the way south until yous see a gap with two crates on either side. Hookshot to the crate contrary to get over the gap. Cheque the mermaid statue here to identify your Scale. Go down the staircase that opens up.
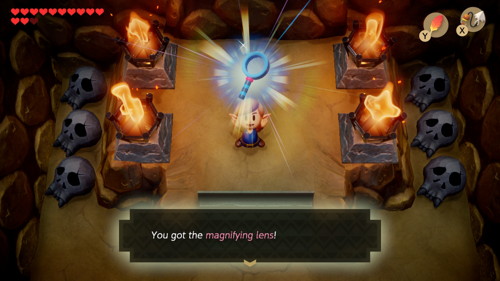
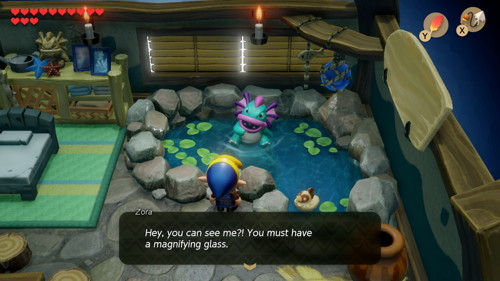
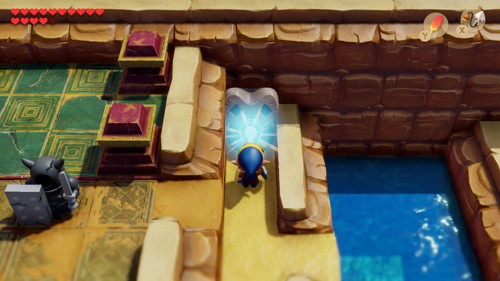
Walk inside to catch the Magnifying Lens. This particular volition permit you lot to meet invisible NPCs and enemies. Exit the cave, defeating the now visible enemies if yous wish. Caput due east from here back to Animal Village. Enter the house in the northeast corner of town and you'll see a Zora that was invisible earlier. Speak to the Zora to get Hole-and-corner Seashell #37.
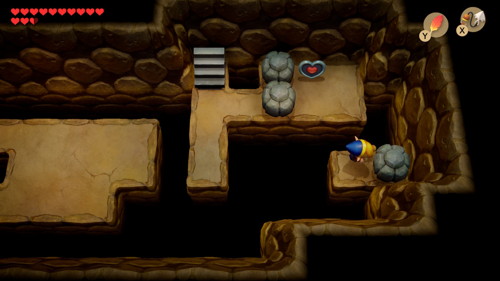
Exit this house and wrap effectually the exterior perimeter of Animate being Hamlet along the cliffside to the n. Flop the wall in the northeast corner and enter the cave. Jump across the gap to the north and place a bomb on another cracked wall. Go through and to the left and yous'll see a cracked boulder here. Toss a bomb beyond to blow it up. Wrap back around and head up using the left entrance. Hookshot across the gap and grab Piece of Heart #23.
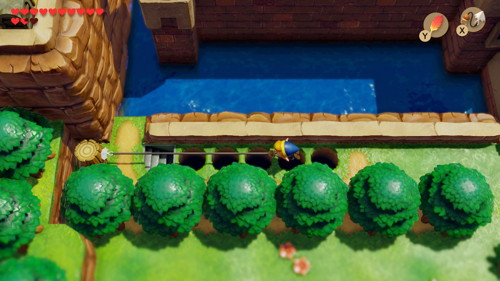
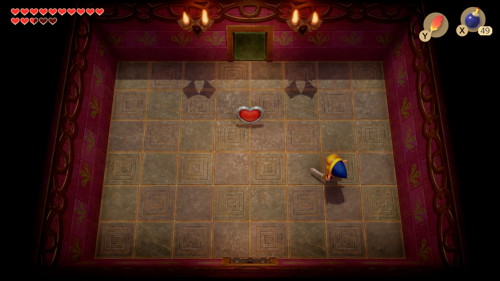
Warp to the Seashell Mansion and head west until you lot achieve a line of v pits in front end of the western moat of Kanalet Castle. Use your hookshot to get across the gap and caput down the stairs. Open the breast hither to get Secret Seashell #38. Warp to Manbo'south Pond subsequently exiting this area.
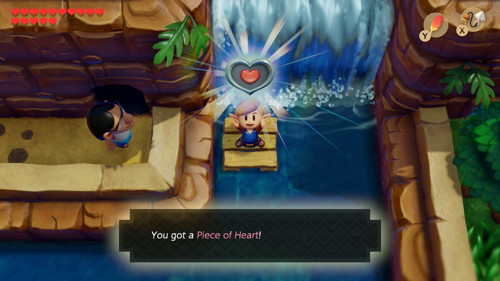
Head due south past the Witch's Hut into the large pit with incessantly spawning Zombies. Elevator the rocks to go down the staircase here. In this cave, toss a bomb so that information technology lands next to the cracked boulder and blows it up. Hop over and stand where the boulder was to hookshot across the gap. Hop on over to the next ledge to take hold of Piece of Heart #24.
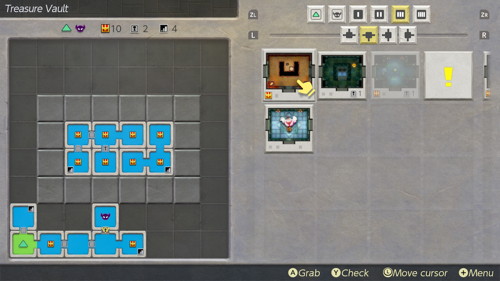
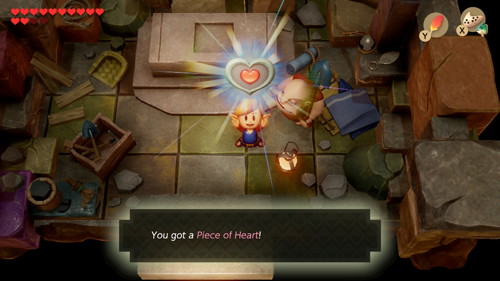
Warp to Dampe's Shack. He should have a number of new chambers for you lot since we've completed a couple of dungeons since the concluding time we were here. You lot'll demand to complete all of the four Two-Shovel difficulty challenges: 'Key Hunter', 'Bombs Away', 'Treasure Vault', and 'Passageway Key'. Afteward, Dampe will give you Piece of Heart #25.
Head dorsum to Mabe Hamlet so caput due north into the Mysterious Wood. Go northeast in the forest and you lot'll come across a cave entrance (looks like a log) blocked by 3 boulders. Move one and enter the cavern. Hookshot across using the treasure chest and open it for fifty rupees. Then hookshot to the left and button the other boulder down. Pick up Piece of Eye #26. Go out the cavern.

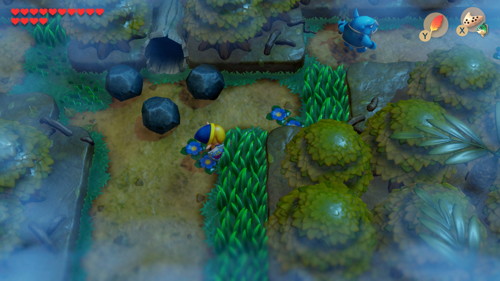
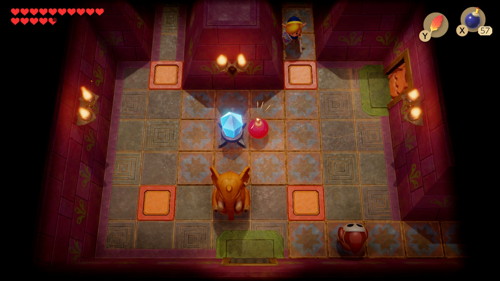
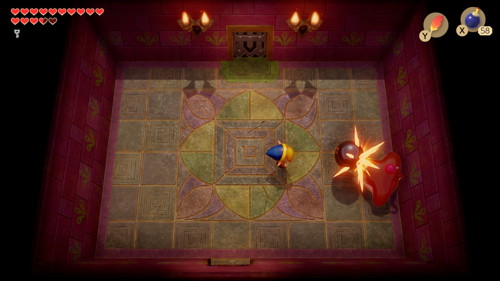
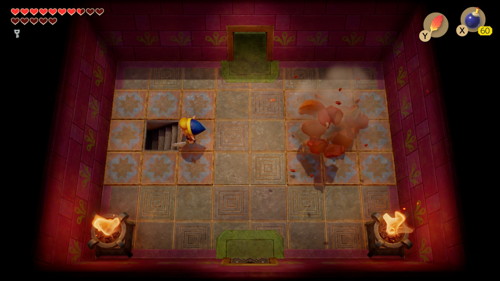
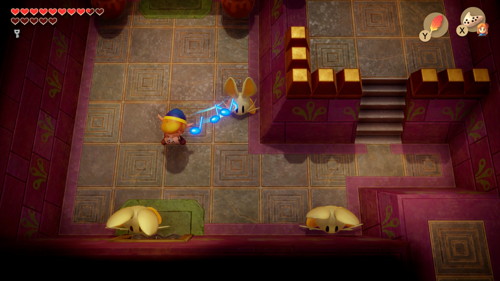
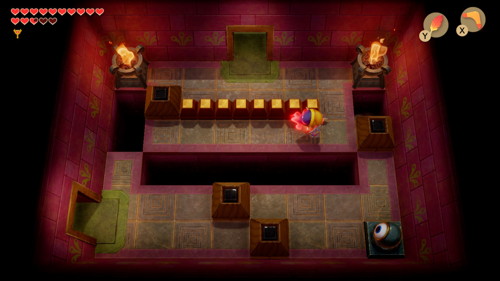
Now, head south to Toronbo Shores. Head due south onto the beach and so continue eastward past the area that y'all first picked up your sword. You'll see a cracked wall that you can bomb open hither. Enter to fund Goriya, who is only visible subsequently picking upwardly the magnifying lens. To get the Boomerang, you lot'll need to trade him i of your items. Trade him your shovel, then buy information technology back for 300 rupees. Now you lot get to keep both items!
South Face Shrine
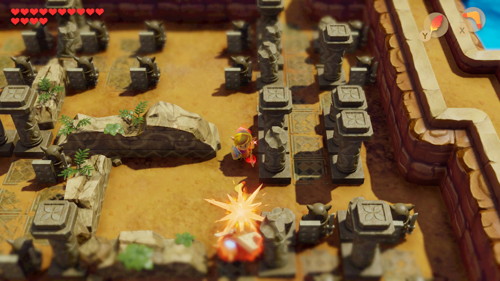
Warp to Creature Village and exit to the w. Caput north along the river here and then east towards Aboriginal Ruins. Caput due south to enter the ruins. The statue enemies here are called Armos. They tin can be quite unsafe, then utilise your new boomerang to take them out chop-chop. If you've been post-obit along with the walkthrough, we already visited here to pick up Secret Seashell #26. If you didn't do that, now is a good time. Either way, awaken the Armos and defeat them to make your way to the building in the northwest corner of the maze.
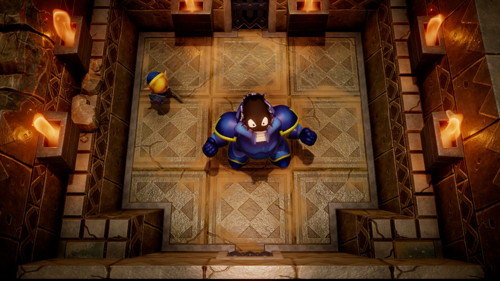
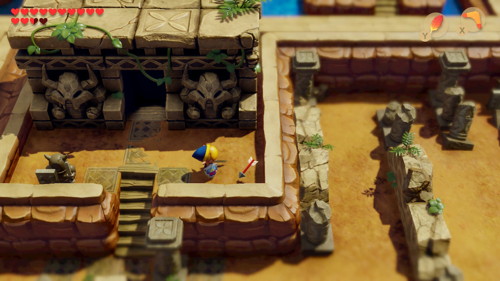
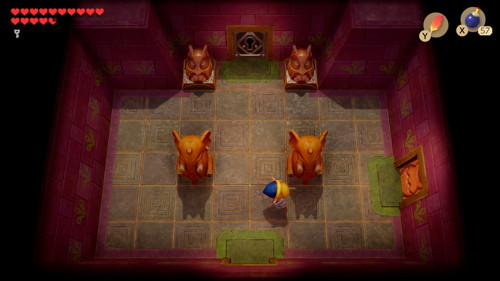
This edifice is chosen Due south Face Shrine. Walk down the steps and enter the side by side room to face up a mini-dominate: Armos Knight. Use Roc's Feather to dodge his ground-shaking attacks. So quickly charge a spin-assail to weaken his armor. Once his armor is weak (his shield will be gone) just shoot a couple arrows and he'll be defeated.
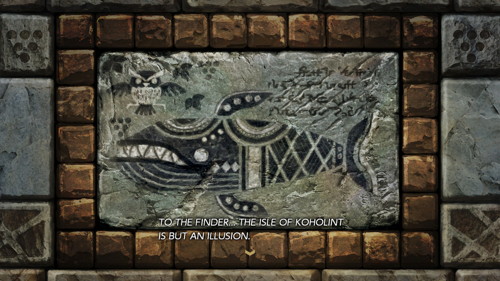
The Armos Knight will exit behind the Confront Key. Choice it upward and head into the side by side room. Here yous can enjoy a petty bit of lore and hints nearly the nature of the Wind Fish and Koholint Island. Get out the shrine and the owl will come and speak to you. Backtrack through the maze and get out Aboriginal Ruins to the north.
River Rapids
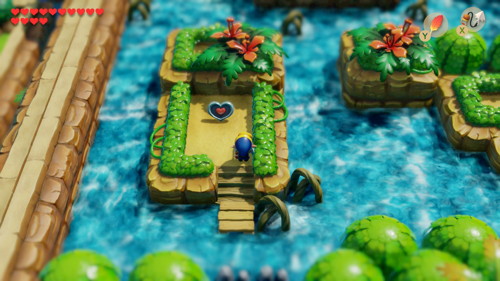
North of Ancient Ruins, there is a small maze of boulders and bushes. Just slash and lift to make your way through to the top-left. Hop into the water and swim e for a bit hither. Get onto land at the kickoff opportunity and enter the cave here. Hookshot across the ii ledges to get Piece of Heart #27.
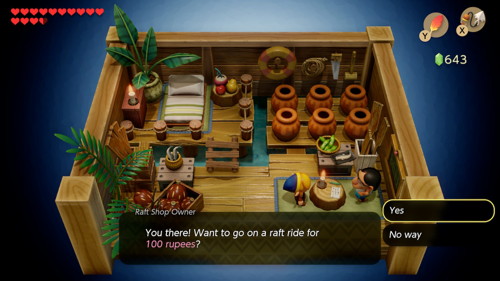
Exit this cave and you'll find yourself on a small island. Enter the firm here. Speak to the man behind the counter to play the Raft Ride game. It costs 100 rupees. Start off with the 'Rapids Raid' fashion so that we can choice up some goodies on our ride.
Take a ride and get as far left every bit y'all can until you achieve a waterfall. Go downwardly the waterfall and utilise your hookshot to stay along the left wall. Keep along the left and y'all'll see an isle that is dwelling house to Piece of Centre #28.
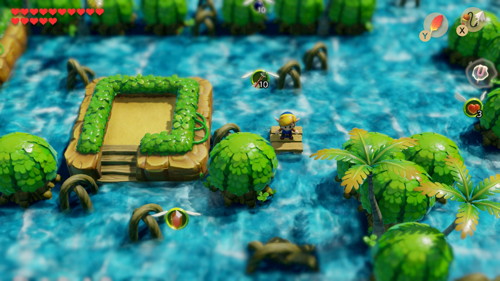
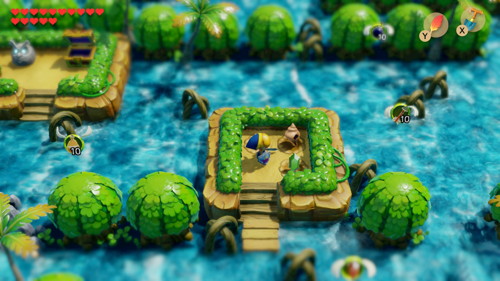
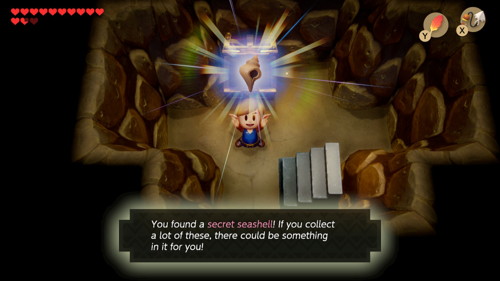
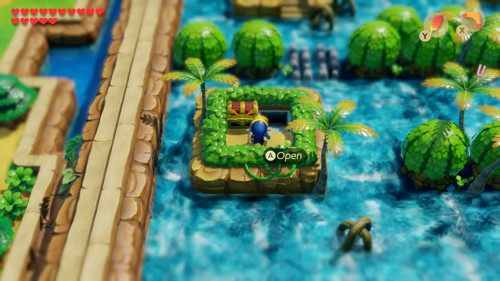
While yet playing the game, head northeast from this island and use the branches to hookshot your way to the small island in the middle that appears to be empty. Apply your shovel in the top-right corner here and go Secret Seashell #39. Now, only finish out this game collecting equally many rupees as you can.
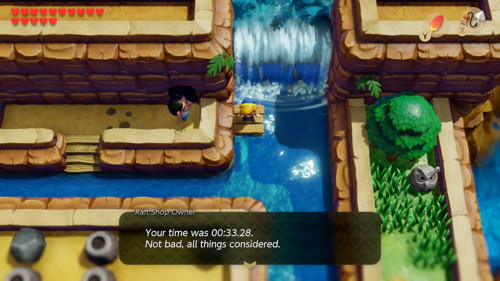
We now want to play the 'Rapids Race' style. There are three unlike prizes yous can get for getting nether sure times. You'll go Piece of Heart #29 for completing the race in under 40 seconds, you'll get Secret Seashell #40 for completing the race in under 35 seconds, and you'll get a Sleeping accommodation Stone for completing the race in under 30 seconds. Think to use the hookshot to speed up your rafting and play the 'Rapids Raid' mode if you are running low on rupees.
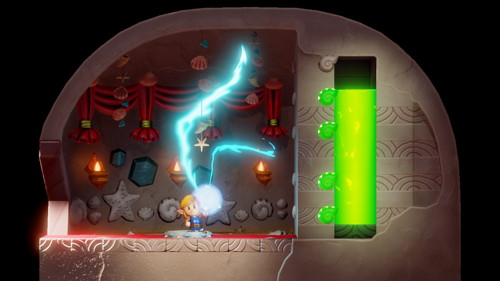
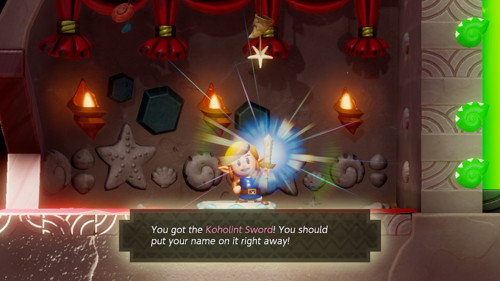
Assuming you at present have twoscore Hole-and-corner Seashells, warp dorsum to the Seashell Mansion. Stand on the pedestal and y'all'll exist granted a sword upgarde. The Koholint Sword will deal double damage and shoot a beam when Link is at full health. With an upgraded sword in hand, let'south go to the next dungeon.
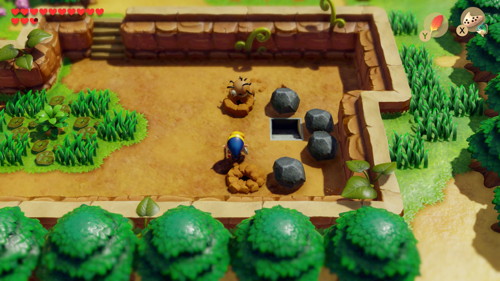
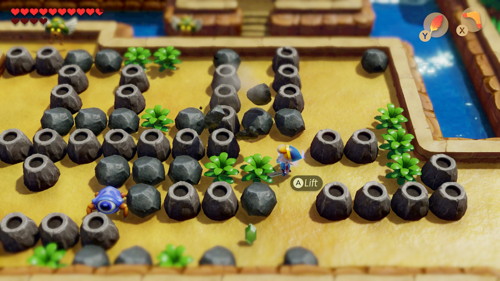
Make your way back to maze of boulders and bushes north of Ancient Ruins. You lot'll find a cracked wall that you tin can bomb north of the go out of the maze. Enter the fairy fountain here, filling your bottles with fairies before the next dungeon. Now, swim to the modest island with two Armos statues. Defeat the one to the left and caput down the staircase hither.
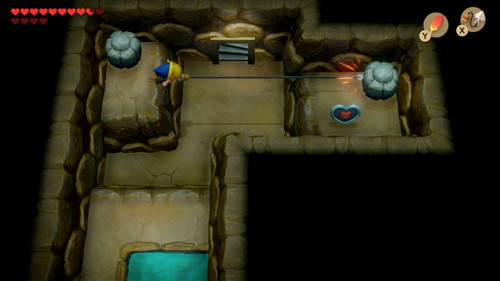
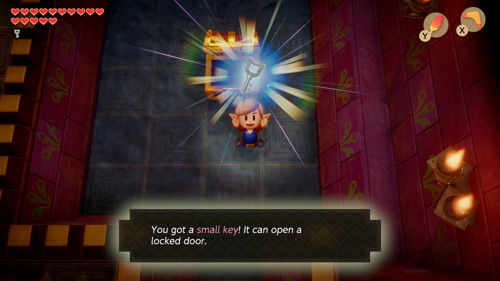
In this cave, hookshot across the gap and leave using the stairs above. Utilize your key on the lock to the right here, and the next dungeon will emerge from the ground. Enter it whenever you lot're ready.
Face up Shrine
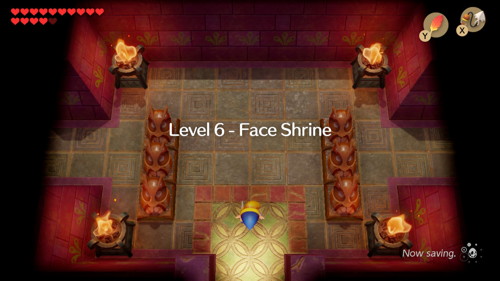
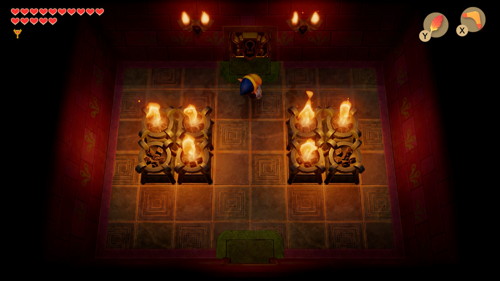
Welcome to Level 6 - Face Shrine. This dungeon is interestingly split into two halves. Nosotros're going to be heading left outset. The enemies in this room are called Wizzrobes and can be defeated with ii hits of your boomerang. Defeat them if y'all wish, but caput up a room using the left path either way.
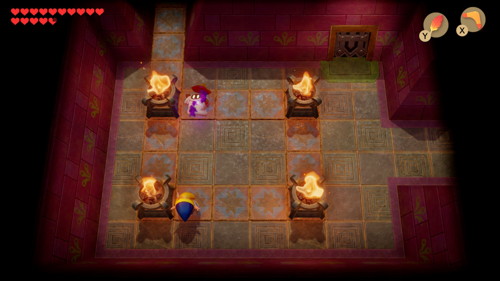
Head upwards and so left to discover yourself in a room with a Shy Guy. Place a flop next to the crystal switch and upwards through the right get out afterwards it explodes. Bomb the cracked wall to the right and enter the room you just opened. Defeat all the enemies in this room and a staircase volition appear. Get down it.
There a couple giant green Bubbles in this 2nd area. Simply avoid them and exit on the left. This room should have the blocks lowered if y'all hit the crystal switch correctly before. Defeat the enemies in this room and and so head up into the adjacent room.
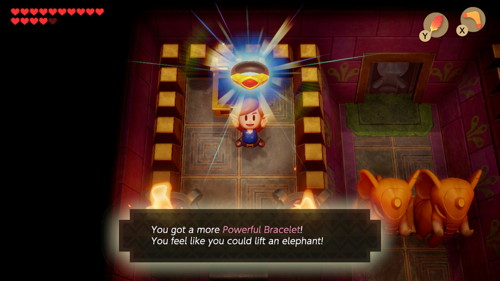
Open the breast here for the Powerful Bracelet. In the gameboy version, it was known as the Level two Ability Bracelet. You can now pick upwards larger objects, similar the behemothic statues in this room blocking the road to the door higher up. Get through the one-way door to find yourself back in the room with the crystal switch that we've been in before.

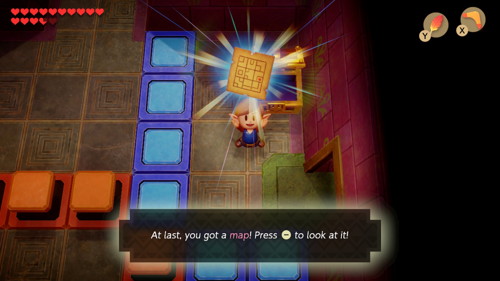
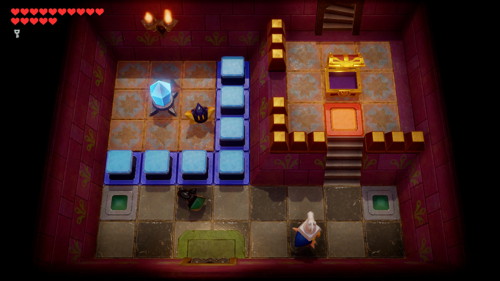
Apply the bomb trick to hit the crystal switch afterwards passing over the block in the pinnacle-left of the room, just as we did earlier. Head upward into the next room. The blocks should be lowered then that you can hit the switch under a pot and caput left. Defeat the three Wizzrobes in the next room to spawn a chest containing the Map. With the blue blocks to the right lowered, caput upwards into the next room.
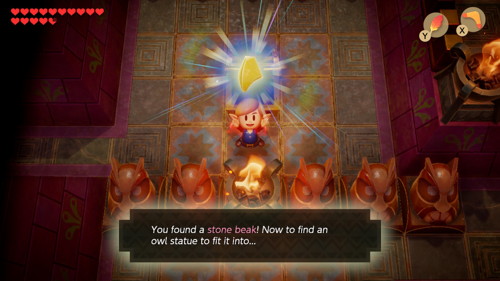
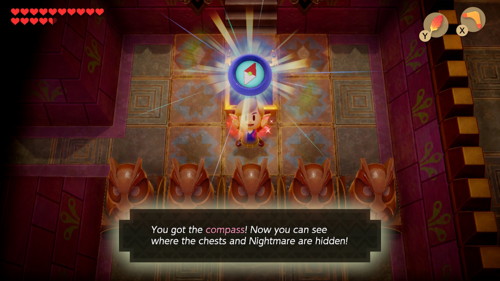
Just go along to the pocket-size room to the right and open up the breast for the Stone Beak. At present go dorsum to the room to the left and throw a pot at the door to open it. Head up and then right to find a chest containing the Compass. Go upwards and hit the switch (making it blue) and follow the narrow path until you reach a room with lowered orange blocks. Defeat the Wizzrobes here and a Minor Key will drop.
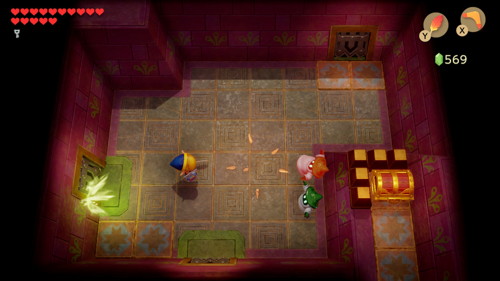
Backtrack left along the narrow path all the mode to the room with two giant statues. Toss ane of them at the door and caput up through it. Grab the chest containing 100 rupees up the steps and get out the dungeon to above. You'll notice yourself dorsum in the Rapid Raft section of the overworld. Open the chest here to get Hush-hush Seashell #41. And so re-enter the dungeon.
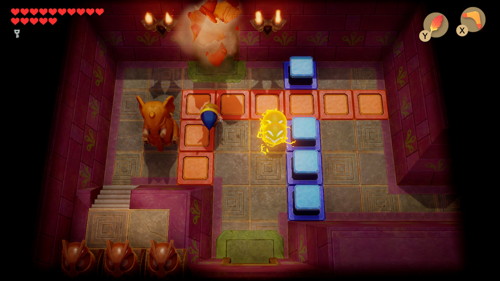
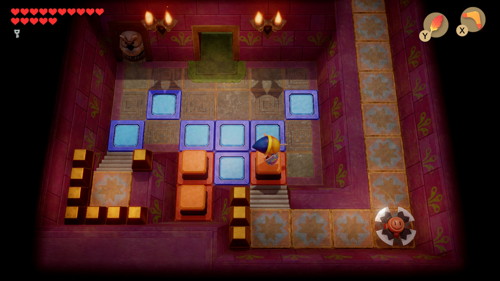
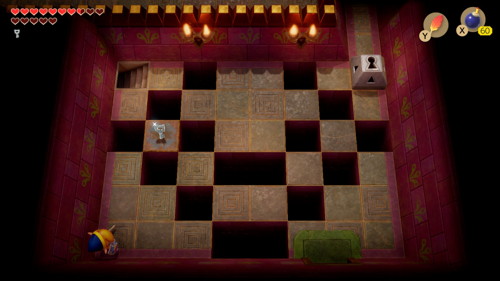
It's helpful to know the basic rules of chess to solve the puzzle in this room. Stand up 3 blocks away and 1 block down (the L-shape that knights move in chess) and toss the chess pieces sideways to go them to land in the holes. In make take a couple tries, only they volition somewhen bounce the right way to country. Hit the crystal switch and head down ii rooms.

Back in the room with the crystal switch and Wizzrobes, we desire to head right. Earlier doing so, toss a bomb at they crystal switch such that the blue blocks are raised earlier you exit this room. Head down from here back in the room with the crystal switch and Shy Guy. Hitting the switch once and so that the orange blocks are raised and throw the statue at the door so you lot tin go out to the right.
Open the treasure breast here to get 100 rupees. Toss the behemothic statue at the door and head down through it. In the next room, there's some other chest containing 50 rupees. Head downwardly a room and right a room and yous'll notice yourself at the archway of the dungeon. With near of the dungeon goodies in manus, we are at present ready to tackle the east side of the dungeon.

Head right from the entrance into a room with many moving platforms. Brand your waay across and avoid the Bract Traps, continuing right. In this room, the Flooring Tiles will rise up and attempt to attack y'all. It's best to stand in a corner and shield until they are finished. Then the door above will open up. Pick up a behemothic statue and toss it at the door to the correct to open it up, and so head through.
In this side by side room, defeat the iv Wizzrobes to open upward all the doors. Head through the door below. In this room, yous'll need to climb the stairs and hop down onto the raised orange blocks. Hop across these blocks and make your way upwards on the narrow passage, avoiding the Blade Trap along the manner. Open the breast here for some Undercover Medicine. This will replenish your hearts if you lose them all in battle. Hop off the ledge and continue up a room.
In this next room, head up through the narrow watery passage until you detect a chest. Open it to get a Small Central. Now backtrack down and left to the room with two giant statues and a locked door. Enter the door and caput upward into the side by side room. Bomb the wall above and enter to have on the dungeon mini-boss.
This mini-boss is chosen Smasher. His merely attack is to throw a large bowling ball at yous. Now that we accept the powerful bracelet, nosotros can toss it dorsum at him to deal damage. He'southward pretty quick, then be sure to avoid his tosses and grab the ball rapidly. After a couple rounds, he'll be defeated and leave behind a fairy and a warp portal to the beginning of the dungeon. Head up into the next room.
As you can encounter on the map, the door above is a fob. Taking information technology will but warp y'all back to the previous room incessantly. Pick upwardly the statue to the left to reveal a staircase that will permit y'all to go out this room. Make your way to the left in the 2D department and set to shield some more Floor Tiles in the adjacent room. When they're all gone, a Pocket-size Key volition drop from above.
Open the locked block and head upward through the opening. Toss a statue at the door to the left and go through it. In this modest room, you'll need to place the chess pieces in their holes over again. It's best to stand one block down and three blocks abroad from the hole to get the slice to land in. Head through the door that opens to the left and so downward the stairs.
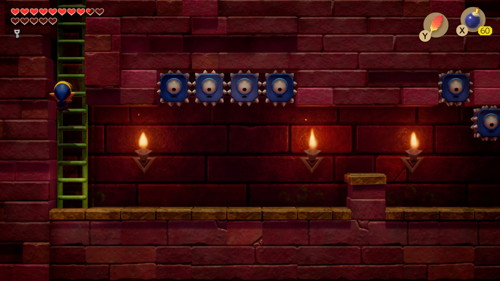
Utilise the Pegasus Boots to speedily nuance to the left earlier the Thwomps have fourth dimension to go y'all. Head dorsum upwards with the ladder to the right. The easiest way to defeat the 3 Pol's Voice in this room is to play 'Ballad of the Wind Fish' on your ocarina, since they have sensitive ears. Head upwardly into the next room.
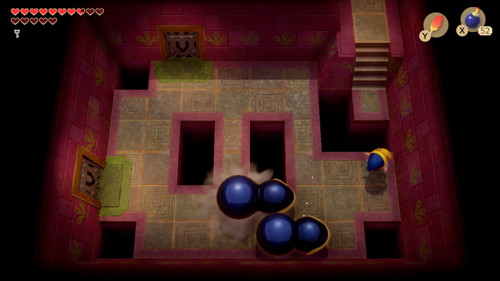
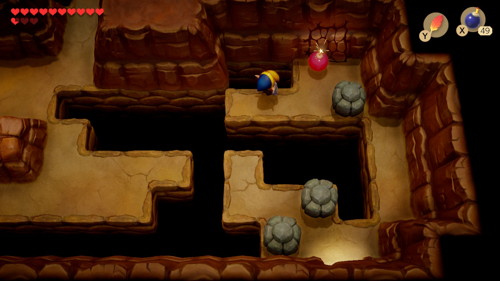
Use a bomb to hit the crystal switch here. Open the chest to get 300 rupees. Place the chess pieces into the holes to exit this room. Head down through two more rooms. There are two Dodongo Snakes in this room that you'll need to employ bombs to defeat, but as nosotros did in a previous dungeon. Place bombs in front of them and they'll gobble them upward. Caput left later defeating them.

Use your hookshot to cross the gap hither and and then employ your pocket-sized primal on the locked block. Head up and you lot'll come across a crystal switch and a chest. Interestingly enough, the chest doesn't seem to open. Merely toss a pot at it and it will open up granting you the Nightmare Key. Walk down and hop off the ledge here. Then continue to the room beneath.
Back in the room with four Wizzrobes, head left a room. Go upwardly three rooms, passing the warp portal, and take the staircase to the left here once again. Go on left through the 2nd area and back upward the ladder. Back in the room with the attacking Flooring Tiles, head down. Defeat the four zols in this room so that you can exit through the door to the right.
In this room, the Beamos enemy will shoot a lazer from its rotating eye if it sees you. Avoid this and defeat the wizzrobe across the gap. Push the block hither to the right and make your way up into the next room. This room is dwelling to the dominate door. Yous can take hold of a fairy to heal up past defeating the enemies if you wish. Otherwise, head through the door when you lot're ready.
Facade
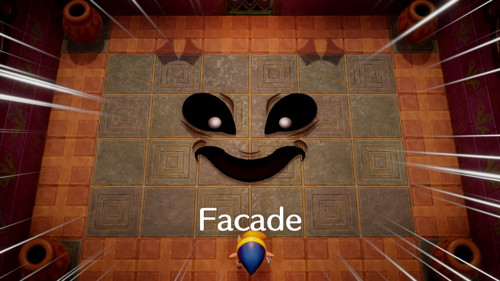
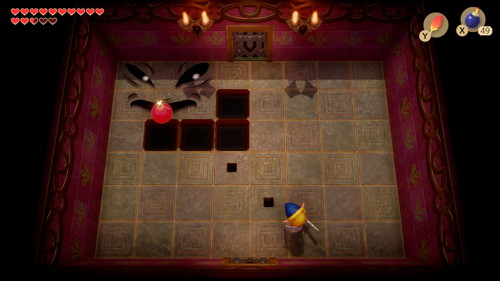
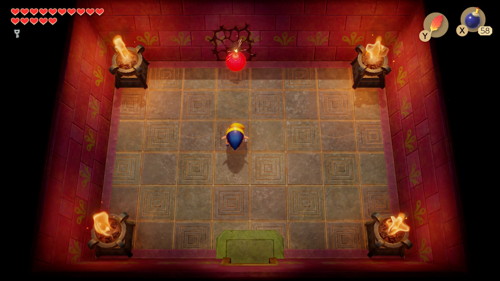
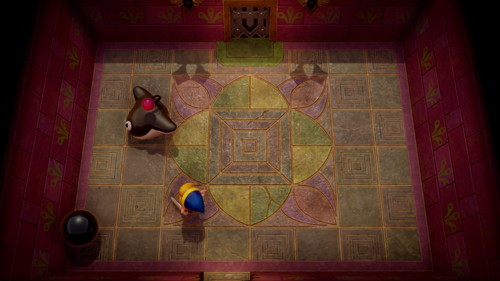
This dungeon dominate, which resembles a face up on the footing, is called Facade. Continuing on his face will hurt you, only he otherwise won't attack you directly. He'll rather furl obstacles at you lot in the room, like floor tiles and pots. The cardinal to dissentious him is to simply identify a bomb near his face. Afterwards a few rounds of taking damage, he'll begin creating holes in the basis. Only avert them and keep bombing until he has been defeated.
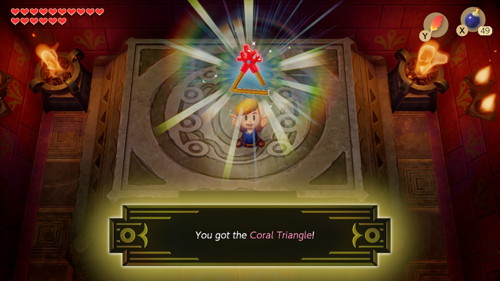
Later winning this boss fight, you'll be left a Heart Container. Pick it up and head into the next room. This Instrument of Air current is chosen the Coral Triangle. Subsequently the dungeon, the owl volition swoop in and suggest y'all visit the mountain tower adjacent.
Back to Catfish's Maw Continue to Hawkeye'due south Tower

How To Get To The Face Shrine,
Source: https://www.linkshideaway.com/links-awakening-switch-walkthrough/face-shrine/
Posted by: morganhinqually.blogspot.com
0 Response to "How To Get To The Face Shrine"
Post a Comment